Rainwater for Rough Times: Your Emergency Backup
Here are the main points to remember about setting up your emergency water backup using rainwater.
Key Takeaways
- Rainwater harvesting provides a free, renewable water source that’s great for emergencies.
- Choosing the right roofing and gutter materials helps collect cleaner water.
- Proper filtration and purification are a must to make rainwater safe for drinking.
- Figure out your water needs and rainfall amounts to size your storage tanks correctly.
- Rainwater can be used for drinking (after treatment), gardening, and other needs when the grid is down.
Understanding Your Rainwater Harvesting Emergency Backup
When the taps run dry, having a backup water source isn’t just a good idea; it’s a necessity. Thinking about emergency water storage solutions now can make a huge difference later. Relying solely on municipal water or bottled supplies leaves you vulnerable if those systems fail. That’s where rainwater harvesting comes in. It’s a practical way to build an off-grid water supply during crisis situations, giving you a degree of self-sufficiency when you need it most.
A simple rain barrel backup system can be your first line of defense. It’s more than just collecting water; it’s about creating a resilient plan. This approach to water collection for disaster preparedness means you’re not starting from scratch when an emergency hits. You’re actively building a resource that can sustain you.
Here’s why it’s so important:
- Independence: You control your water supply, reducing reliance on external infrastructure that might be compromised.
- Cost-Effectiveness: Once set up, the water itself is free, unlike continuously buying bottled water.
- Environmental Benefits: It reduces stormwater runoff and conserves treated municipal water.
Think about it: a significant storm can fill up storage quickly. For instance, a typical home roof can collect around 600 gallons of water for every inch of rain. Having a system in place means you’re capturing that free resource instead of letting it run off. You can learn more about how to set up a basic system at rainwater harvesting basics.
Building a rainwater harvesting system is an investment in your family’s security. It’s a proactive step that provides peace of mind, knowing you have a readily available water source, even when the grid is down or local supplies are disrupted. It’s about being prepared for the unexpected.
Consider the long-term benefits. Beyond immediate emergencies, this collected water can support survival gardens or be used for various non-potable needs around the house, further stretching your resources. For more on storing water long-term, check out emergency water storage tips.
Essential Components for Your Rainwater System
Setting up a system to catch rainwater isn’t rocket science, but you do need a few key pieces to make it work. Think of it like building with LEGOs; you need the right bricks to make something sturdy. Getting these parts right means you’ll collect more water and keep it cleaner.
Choosing the Right Roofing Materials
Not all roofs are created equal when it comes to collecting water. Some materials are way better than others. The best ones are usually things like terracotta, concrete tiles, certain types of metal like enameled steel, or glazed slate. These surfaces don’t leach weird stuff into your water. You’ll want to steer clear of asphalt or fiberglass shingles, as they often have chemicals to stop moss and algae. Cedar shingles can also be a problem. Basically, the smoother and less chemically treated, the better.
Selecting Appropriate Gutter Types
Your gutters are the highways for the water coming off your roof. For collecting water, coated aluminum or vinyl gutters are a solid choice. Galvanized steel works too, but if you’re planning to drink this water later, you might want to stick with the others unless you’re really good at filtering. Avoid copper or lead gutters; those are a definite no-go for drinking water. Ideally, your gutters should be about 5 inches wide and sloped just a bit so the water flows towards your downspouts.
Determining Optimal Tank Size
This is where you need to do a little math, but don’t worry, it’s not too bad. You need a tank that’s big enough to hold a good amount of water but not so huge that it’s just sitting there mostly empty. To figure this out, you’ll want to look at how much rain your area gets on average and how much water your household uses. A good rule of thumb is to aim for a tank that can hold at least a few weeks’ worth of your non-potable water needs. For potable water, you’ll need to factor in purification, which might influence how much you store. If you’re thinking about powering a well pump during outages, you’ll need to consider the pump’s power needs and how much water it uses, similar to how a solar backup system for well pumps works.
- Calculate your roof’s square footage. This is your catchment area.
- Find your average annual rainfall. Local weather data or online resources can help.
- Estimate your daily water usage. Focus on non-potable uses first, like flushing toilets or watering plants.
Sizing your tank correctly is a balancing act. Too small, and you’ll overflow during heavy rain. Too big, and you’re spending more money and space than you need, especially if you don’t get a lot of rain.
Remember, even a basic setup can make a big difference. If you’re concerned about basement flooding during storms, a sump pump backup is also a smart move, though that’s a different system than rainwater collection. A battery backup for a sump pump can save you a lot of headaches.
Ensuring Safe Drinking Water from Your Harvest
So, you’ve got a good amount of rainwater collected, which is fantastic. But before you start chugging it down, we need to talk about making it safe to drink. Rainwater, as it falls and runs off your roof, can pick up all sorts of things – dust, bird droppings, bits of leaves, you name it. These aren’t just yucky; some can carry germs that will make you sick. Securing potable water in emergencies means having a reliable way to clean up your collected water.
The Importance of Filtration and Purification
Think of filtration and purification as the final steps to get your rainwater from ‘collected’ to ‘drinkable’. Filtration is like a sieve, catching the bigger bits – leaves, dirt, that sort of thing. Purification is the germ-killer, taking care of bacteria and viruses that you can’t see. Without these steps, your collected water is really only good for watering plants or maybe flushing toilets, not for making coffee or quenching your thirst. It’s about making sure your backup water supply is actually a safe one.
DIY Sand and Charcoal Filter Methods
If you’re looking for a low-tech way to get started, a DIY filter can be a lifesaver. You can build a pretty effective filter using layers of gravel, sand, and activated charcoal. The gravel catches the big stuff, the sand gets the smaller particles, and the charcoal helps remove some odors and tastes, plus it can trap certain contaminants. You’ll need a container, like a food-grade bucket, and some clean materials. Layer them up, pour your water through, and collect the cleaner water at the bottom. It’s not a magic bullet, but it’s a solid step towards cleaner water. You can find detailed plans online for building these, which is handy if you’re preparing for grid-down scenarios.
Here’s a basic idea of how the layers work:
- Top Layer: Coarse gravel (to catch large debris)
- Middle Layers: Fine sand (to filter out smaller particles)
- Bottom Layer: Activated charcoal (for taste, odor, and some chemical removal)
- Collection: A clean container at the bottom
UV Sterilization and Gravity-Fed Purifiers
For a more hands-off approach, especially if you have a bit of power or a well-thought-out gravity system, UV sterilizers are a great option. These devices use ultraviolet light to zap any remaining microorganisms in the water. You typically run the water through the UV unit after it’s been filtered. It’s effective and doesn’t add anything to the water. Gravity-fed purifiers, often using ceramic filters or other media, can also work without electricity, relying on the water’s own weight to push it through the cleaning elements. These systems are great for continuous water supply during outages. Remember, even with these methods, starting with the cleanest water possible through good pre-filtration makes your job easier and your water safer.
Treating your harvested rainwater is non-negotiable if you plan to drink it. Don’t skip this step. Even if your water looks clear, unseen contaminants can pose serious health risks. Always research and implement a treatment method that suits your resources and needs for reliable emergency water.
When considering purification, it’s also wise to think about your overall water storage. For instance, backup solutions for your well pump might involve similar purification steps if the well water itself is questionable. Having multiple layers of preparedness is always the best strategy.
Maximizing Your Rainwater Collection Potential
Getting the most out of your rainwater harvesting setup isn’t just about having a few barrels outside. It takes some planning, quick math, and regular care. Here’s a closer look at how you can step up your emergency water game without getting buried in complicated advice.
Calculating Your Household Water Needs
Knowing how much water you really use each day is the first step — not just for drinking, but for cooking, washing up, and maybe even tending your garden if you’re growing food. Most adults need about 1 gallon per day just for drinking, but that won’t cover everything else. For a typical family of four focusing on the essentials, here’s a simple table to help break it down:
| Use | Daily Need Per Person (gallons) | Family of 4 (gallons) |
|---|---|---|
| Drinking | 1 | 4 |
| Cooking/Washing | 2 | 8 |
| Minimal Hygiene | 2 | 8 |
| Daily Total | 5 | 20 |
Even if you pare things down, you’re still looking at 600 gallons a month. If you plan to use rainwater for everything, your tanks need to account for that, with extra for dry spells.
Understanding Rainfall Yields
A lot of folks are surprised at just how much water they can coax from their roof. Here’s an easy formula:
Square Feet of Catchment Area x Inches of Rain x 0.62 = Gallons Collected
Let’s say your roof is 1,000 sq. ft. and you get 2 inches of rain in a storm:
1,000 x 2 x 0.62 = 1,240 gallons!
But if your tanks are only the size of a kids’ pool, most of that water goes to waste. So sizing is everything.
If you find you’re constantly overflowing your tanks after a downpour, it’s time to rethink your storage. Don’t let free water slip away — plan ahead for the biggest storms and your future self will thank you.
It’s worth keeping your system in shape, too. Cleaning gutters and keeping your catchment area tidy not only protects your drinking water, but can unlock significant cost savings and deeper peace of mind.
Expanding Your System for Long-Term Storage
One barrel won’t cut it for real emergencies. Swapping small tanks for larger ones—or chaining them together—can bridge you through drought or supply disruptions.
Here are a few ways to grow your backup water:
- Connect multiple barrels with simple plumbing
- Move up to larger cisterns, even underground if space is tight
- Add overflow routes to direct extra water to garden beds
- Use shaded or dark tanks to slow algae growth
Every tank added to your system is another layer of security. Just remember, the bigger the setup, the more routine care it’ll need. Regular upkeep goes a long way — neglected tanks turn into a hassle fast, which is why maintenance is so important in any rainwater collection plan.
Bottom line: Building up your rainwater storage isn’t an all-or-nothing deal. Start with truly knowing how much you use, find ways to hold onto more of what falls, and expand at your own pace. It’s about making tomorrow’s emergencies just a little less stressful.
Practical Applications of Harvested Rainwater
So, you’ve got a decent amount of rainwater collected. Now what? It’s not just for watering your prize-winning petunias, though that’s a good start. Think of this collected water as a backup resource, ready for when the taps run dry or the municipal supply gets questionable. This water can significantly reduce your reliance on treated municipal water for many tasks.
Irrigation for Survival Gardens
This is probably the most straightforward use. If you’re growing any kind of food, whether it’s a few herbs on the windowsill or a full-blown survival garden, rainwater is gold. You can hook up a hose directly to your storage tank or use watering cans. It’s especially useful during dry spells when your plants really need that extra drink. Remember, healthy plants mean more food, which is pretty important when things get tough. You can even connect your system to existing sprinklers if you have them, making watering a whole lot easier. For those serious about self-sufficiency, this is a big win.
Non-Potable Uses During Grid-Down Scenarios
When the power grid goes down, so does your running water, at least the pressurized kind. But your harvested rainwater can step in. Think about flushing toilets – that uses a surprising amount of water. Washing clothes, cleaning dishes, or even just general house cleaning can all be done with your stored rain. It’s also great for washing your car, topping off a swimming pool, or giving your pets a bath. Basically, any task that doesn’t require the water to be perfectly pure can be handled. This conserves your treated water for drinking and cooking. You can find more details on non-potable uses for collected rainwater.
Potable Water After Treatment
Now, for the really important stuff: drinking water. You can’t just drink rainwater straight from the barrel, not usually anyway. It needs to be treated. This usually involves a multi-step process. First, you’ll want to filter out any larger debris. Then, depending on your setup, you might use UV sterilization or chemical treatments like purification tablets. Once treated, this water is safe for drinking, cooking, and preparing food. Storing treated rainwater means you have a reliable source of safe drinking water, even if the main supply is compromised. This is a key part of water redundancy for your home.
Advanced Rainwater System Considerations
So, you’ve got your basic rainwater setup humming along, collecting water like a champ. But what happens when you need to move that water around, or when you want to make sure what you’re collecting is as clean as possible right from the start? That’s where these advanced considerations come in. They’re about making your system more robust and your collected water more usable, especially when you can’t just turn on a tap.
When a Water Pump Becomes Necessary
Gravity is great, but it only gets water so far. If your storage tank is lower than where you need the water, or if you want to pressurize your system for things like a shower or a washing machine, you’ll need a pump. There are a few types to consider:
- Submersible Pumps: These sit directly in your tank, pushing water out. They’re often quieter and more efficient.
- Surface Pumps: These sit outside the tank and draw water up. They’re easier to access for maintenance.
- Hand Pumps: A reliable, low-tech option for basic water transfer, especially during power outages. They’re great for filling smaller containers or for direct use.
Choosing the right pump depends on your water volume needs and how you plan to use the water. For instance, if you’re looking to run a small irrigation system, a lower-pressure pump might do. But for household use, you’ll want something with more oomph. You can find some great options for off-grid water pumps that are designed for these kinds of applications.
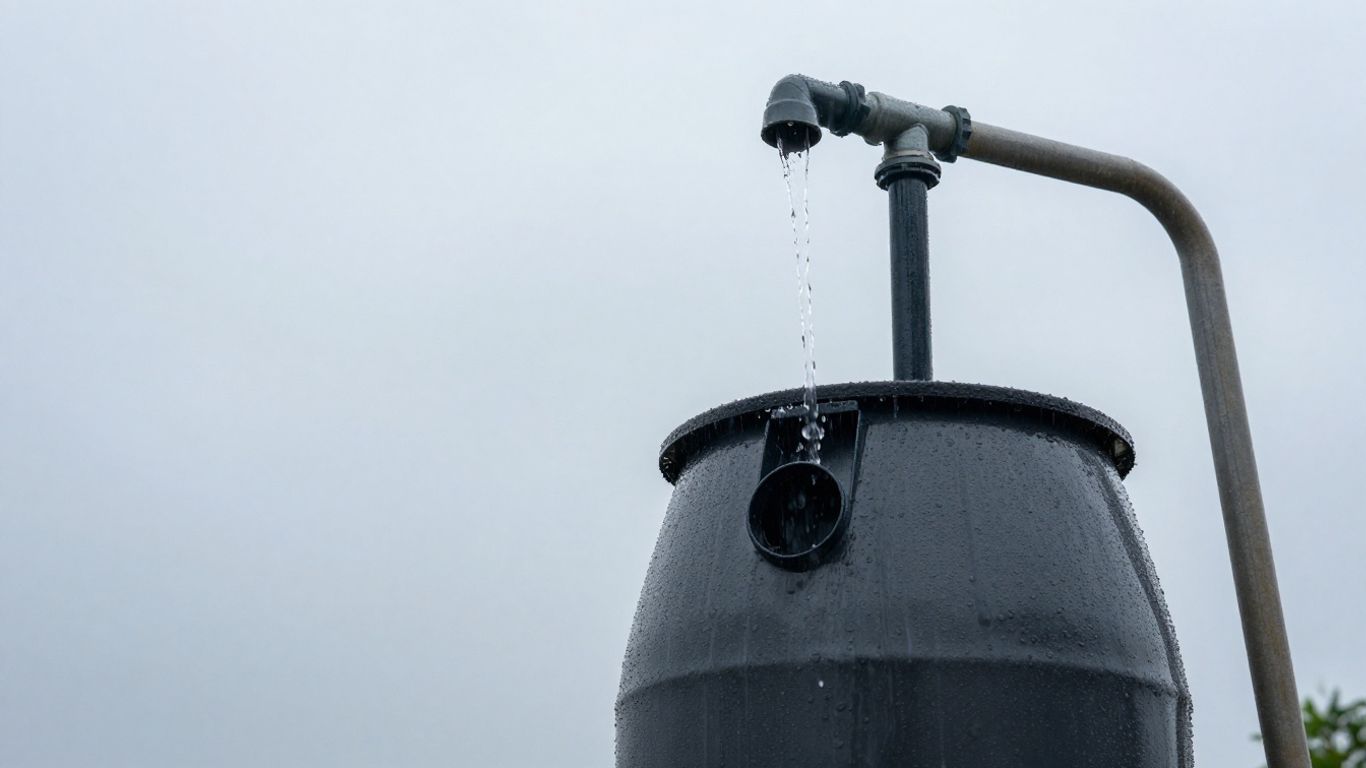
First-Flush Diversion for Cleaner Water
Think about your roof after a long dry spell. It’s probably got dust, leaves, maybe even bird droppings. The very first bit of rain washes all that gunk off. A first-flush diverter is a simple but smart addition that captures this initial, dirtier water before it gets to your main storage tank. This means the water stored is significantly cleaner, reducing the load on your filters later on.
Here’s a basic idea of how it works:
- Rain starts falling, and the first water hits your roof.
- This initial runoff flows down your gutters and into the diverter pipe.
- The diverter pipe fills up, pushing cleaner water towards your storage tank.
- Once the diverter is full, a ball or float might seal the inlet, or the water simply overflows into the main tank.
- After the rain stops, the diverter pipe slowly drains, ready for the next rainfall.
It’s a small step that makes a big difference in the quality of your stored water. Some systems come with built-in diverters, but they can often be added to existing setups.
Cisterns Versus Rain Barrels
When it comes to storing your collected water, you’ve got options, and the choice often comes down to volume and space. Rain barrels are typically smaller, often repurposed food-grade barrels, holding around 50-75 gallons. They’re great for smaller gardens or for non-potable uses where you don’t need a huge amount of water.
Cisterns, on the other hand, are much larger storage tanks, ranging from a few hundred gallons to thousands. They are designed for significant water storage, making them more suitable for household use, larger irrigation needs, or for ensuring a supply through extended dry periods. Cisterns can be installed above ground or buried underground, which can help keep the water cooler and prevent algae growth. If you’re serious about having a substantial backup supply, a cistern is likely the way to go. For example, if you’re looking at storing water for a larger property or for more demanding uses, you might need a system similar to commercial rainwater harvesting setups in terms of scale.
Making these advanced considerations part of your rainwater harvesting plan means you’re not just collecting water; you’re building a reliable, usable water source for the long haul. It’s about thinking ahead and making smart choices for your water security.
Conclusion
Setting up a rainwater harvesting emergency backup system is a smart move for anyone wanting more water security. It doesn’t have to be complicated or cost a fortune. By taking simple steps now, you can create a dependable water source that keeps flowing, even when the taps go dry. Think of it as investing in peace of mind for yourself and your family, ensuring you’re better prepared for whatever comes your way. It’s a practical way to gain independence and have a reliable water supply when it matters most.
Frequently Asked Questions
Why should I bother with rainwater harvesting for emergencies?
When emergencies happen, like power outages or natural disasters, the water from your taps might stop working. Having a rainwater setup means you have your own water supply ready to go, so you won’t be left without something so important.
What kind of roof is best for collecting rainwater?
Some roof materials are better than others. Smooth, non-toxic surfaces like metal, tile, or slate work well. You might want to avoid asphalt or fiberglass shingles because they can shed tiny bits and chemicals into the water.
Do I really need to clean rainwater before drinking it?
Yes, absolutely. Even if it looks clean, rainwater can pick up stuff from your roof, like bird droppings, dust, or pollen. You need to filter out the gunk and then purify it to kill any germs before you drink it.
How big should my rain barrel or tank be?
That depends on how much water your household uses and how much rain you get. A small barrel might fill up fast, but a huge tank might be overkill. It’s about finding a balance that fits your needs and your space.
Can I use collected rainwater for anything besides drinking?
Definitely! You can use it for watering plants in your garden, flushing toilets, washing clothes, or cleaning. These are called non-potable uses, and they save your treated drinking water for when it’s really needed.
What’s the difference between a rain barrel and a cistern?
Think of a rain barrel as a smaller, often portable container, usually connected directly to a downspout. A cistern is typically a much larger, more permanent tank, often buried or built into the ground, designed for storing a lot more water.